Basic Steps to Install the Video Counting System at an Object
1) CHOOSING THE NUMBER OF SENSORS ACCORDING TO PROJECT
The basic parameters for choosing the number of sensors to fit the entrance area are the width of the entrance group, its height and expected traffic.
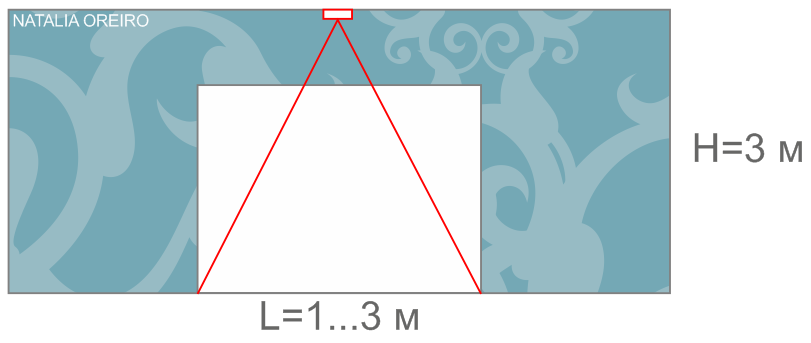
For clarity the entrance groups, widely spread in shopping centers and boutiques, can be divided into three categories: A – not wide, up to three meters, B – wide, from 4 to 7 meters, and C- super wide stairwells from 7 meters and wider.
А – not wide entrance groups, up to three meters wide, are very common for shopping centers and small stores. One video counter kit is quite sufficient for such entrance groups – the customer traffic at such objects ranges within 200 – 1000 people a day, and one sensor is more than enough to count the traffic here.
Installation height varies from 2.5 to 5 meters.
B – Wide entrance groups, from 4 to 7 meters wide, with small customer traffic. They are very common for not large shopping centers with ceiling height of 3 to 4 meters. In case of expected traffic of 400 people a day one counting area will be absolutely sufficient to cover the whole entrance group with one video counter.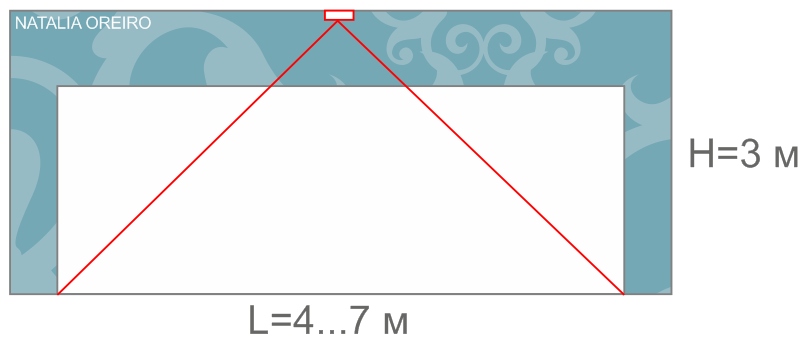
B' – Wide entrance areas of 4 to 7 meters wide with high customer traffic. They are common for large shopping malls with expected traffic of 400 people and more. In order to increase the counting accuracy at such entrance groups it is a good practice to install two video counters as shown in the diagrams below.
C - Super wide stairwells from 7 meters and wider are common for large entrance areas of shopping malls. In this case the video counters are installed each 3 … 3.5 meters and grouped by means of intelligent grouping into one large counting area of 4 to 70 meters wide.

2) INSTALLATION PLACE RECOMMENDATIONS
The video counter is maintenance-friendly both when it is installed at a high angle to the horizontal and within the minimum operating area of counting, but if you can install the sensor in the right way initially, then we encourage you to comply with the following recommendations, which will help increase the counting accuracy:
For efficient counting the video sensor is to be installed within the area where:
- customer traffic is distributed in the best way
- action of sunlight is minimized
- in-swing door does not interfere with the work of sensor
- camera view does not reach the entrance door
- video counter will be downward directed - the insignificant misalignment or inclination is admissible in case the customer traffic grasped by the counting area is not high.
Here is the illustration of the wrong choice of video counter installation place – almost half of the video counter operation area is occupied by the wall: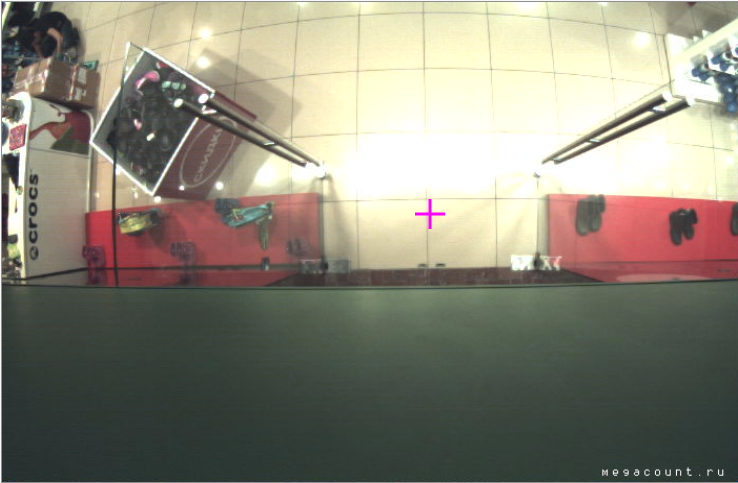
Here is the illustration of the wrong choice of video counter installation place – almost half of the video counter operation area is occupied by the door and thermal screen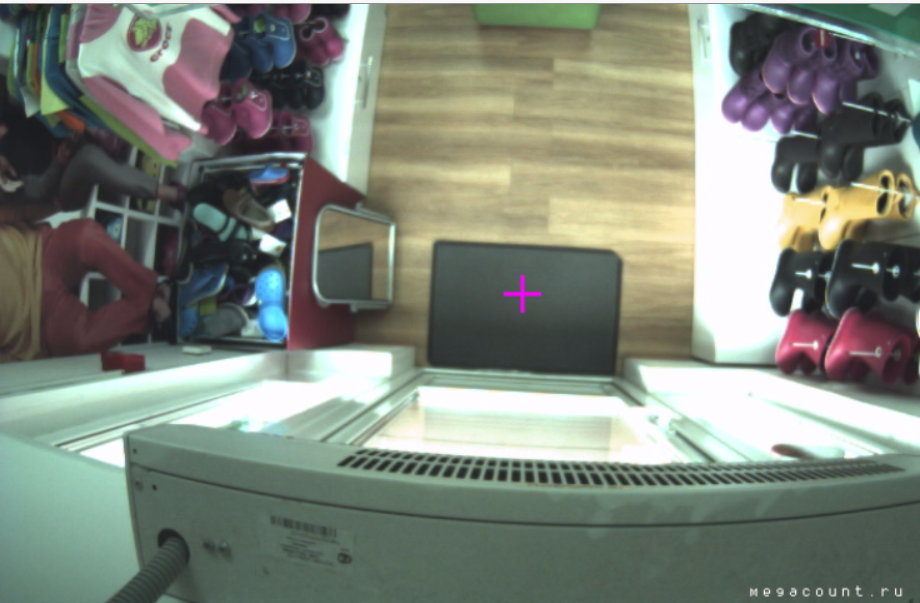
Here is the illustration of the wrong choice of video counter installation place – video sensor view includes the wall and the lamp, besides the sensor is inclined at a high angle to the horizontal.
Here is the illustration of the wrong choice of video counter installation place – the sensor view includes the glass door and the in-swing door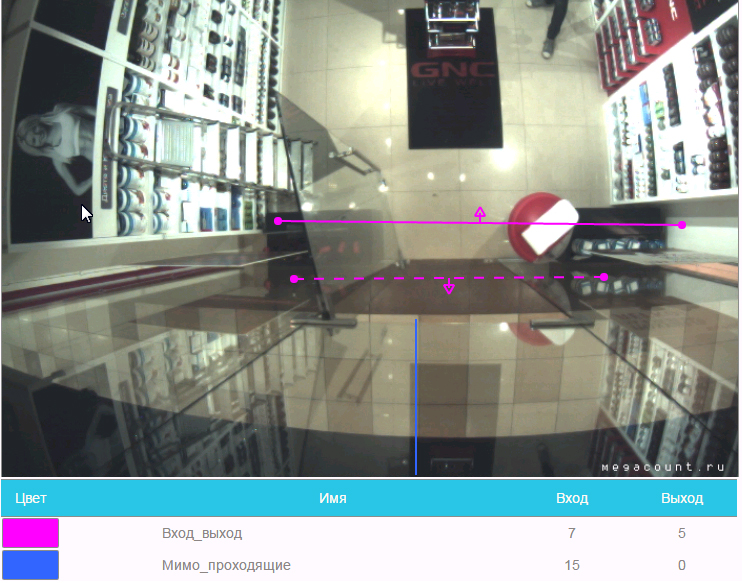
It doesn’t mean therefore that the system won’t work in such circumstances. The Ufatech counters allow to keep counting in a complex environment, and such location of counters is admissible though not desirable. Everything depends on the tolerance level you are ready to accept as a result. For example the tolerance level for the aforementioned counters will be of 5 to 7 percent. For some clients these values are quite acceptable, and for the others they are impossible.
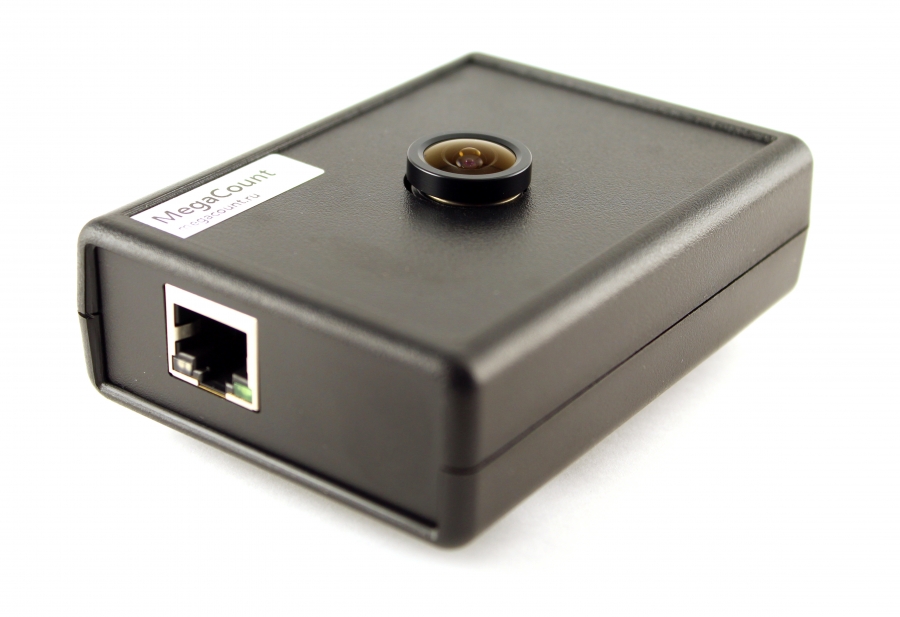
3) VIDEO COUNTER INSTALLATION AND CONNECTION
The video sensor kit includes everything one needs for installation. So as to connect the sensor one should lay a twisted-pair wire from switch board router to the entrance group. The sensor is powered up according to PoE technology.
- Installation Master Diagram for Most Objects with Sensor Connection via PoE Injector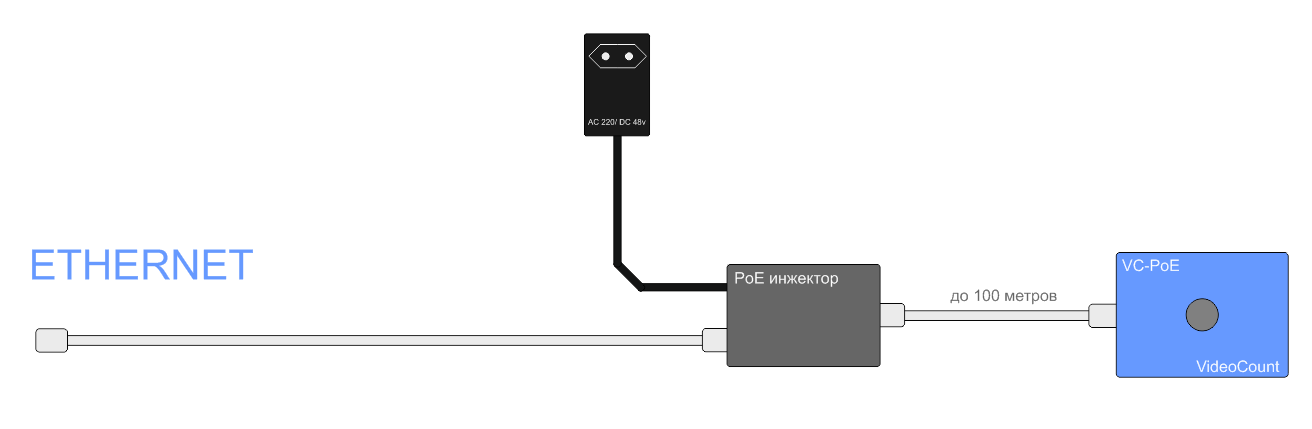
- If there is a PoE switch at the object the connection diagram will look in the following way: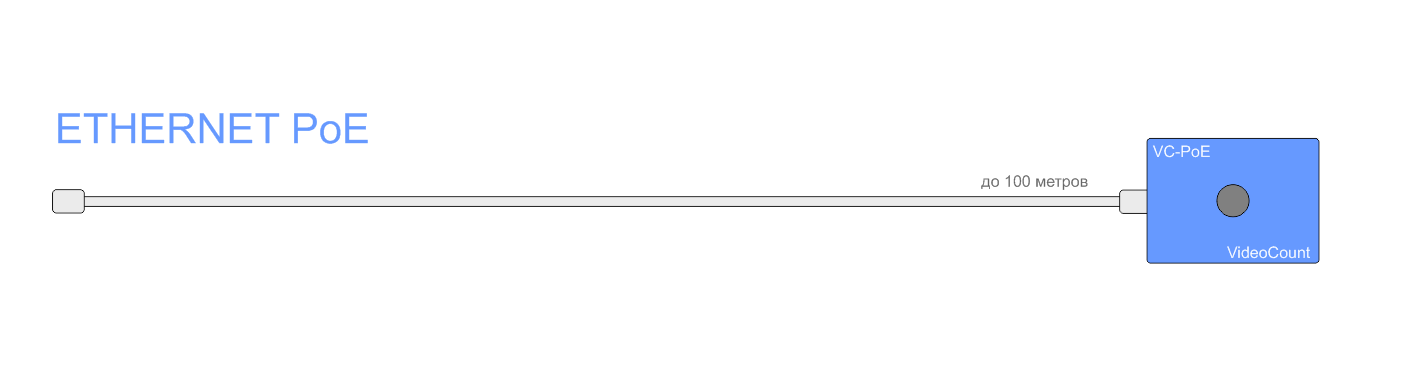
- In case the counter is installed in a mall or a store with several entrances the PoE switch can be used.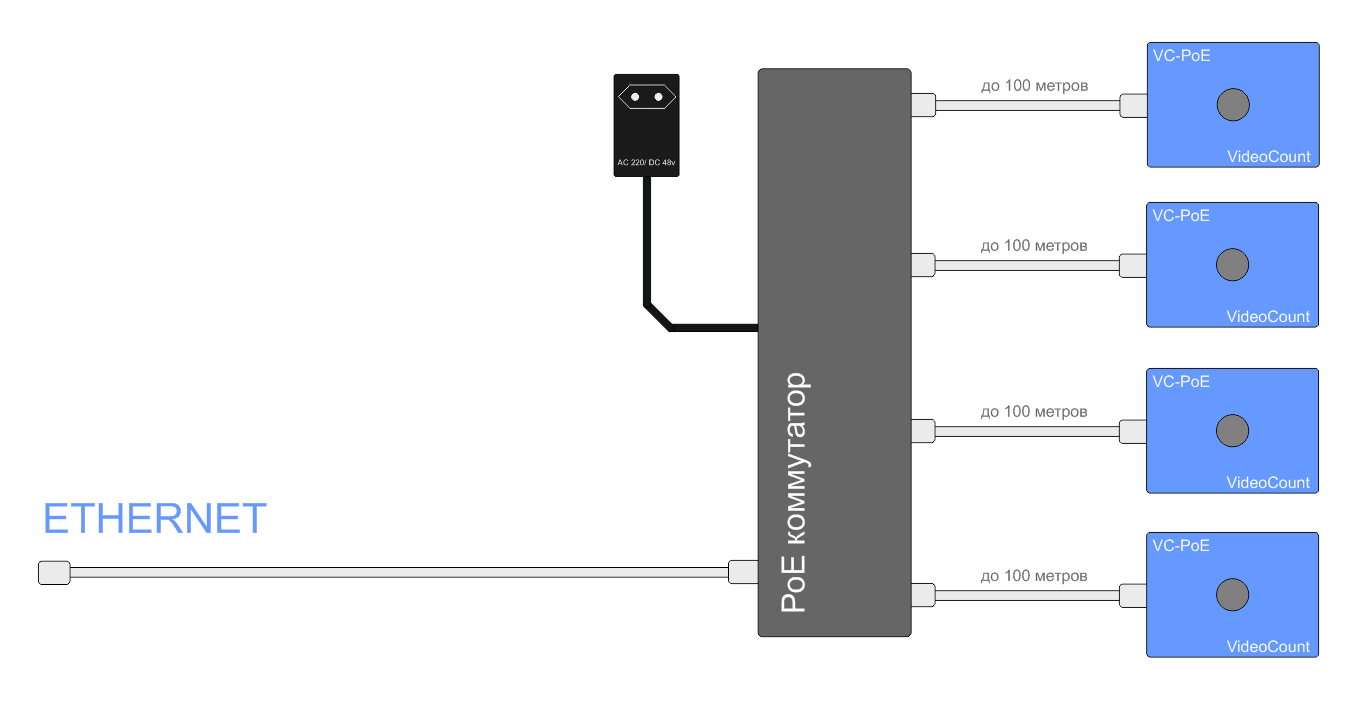
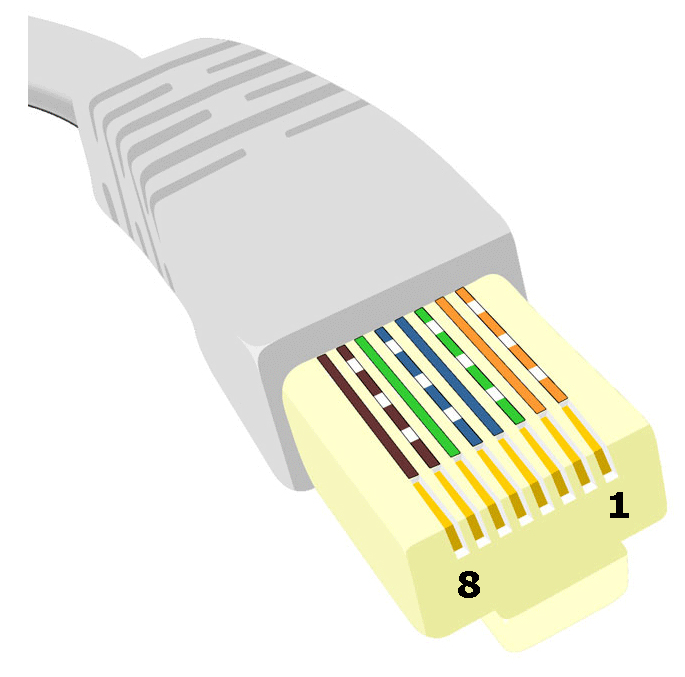
It is a good practice to use the off-the-rack patch cords as wires. In such a way you will save crimping time and minimize the risk of the wrong crimping of cable caps.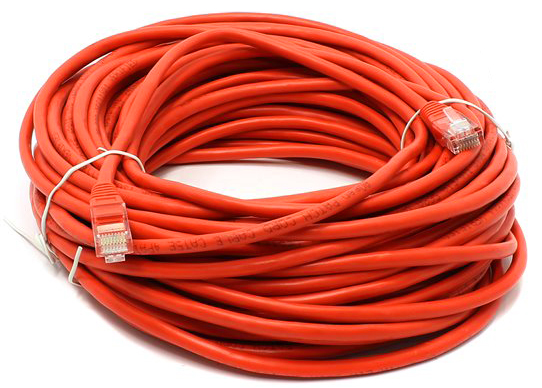 If the crimping cable is used, the crimping is made according to the direct diagram.
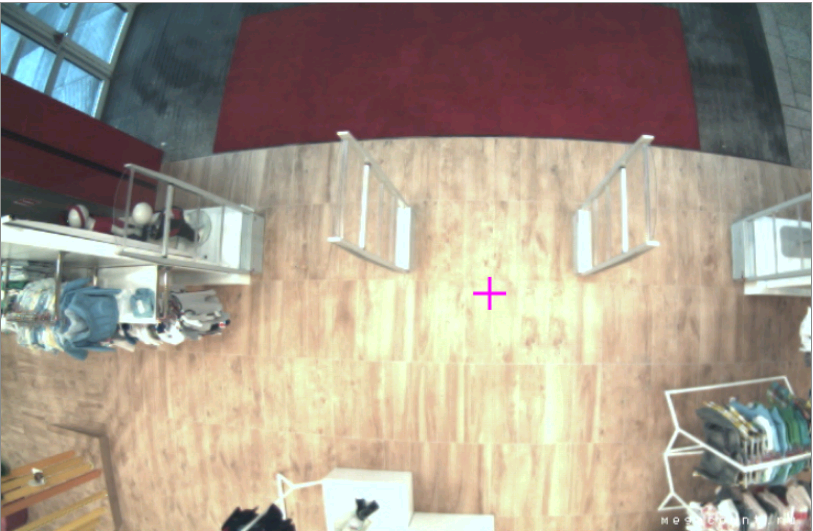
4) CAMERA VIEW AND ANGLE CHECK
After the sensor is installed and connected, one should check the camera angle and view using the counter interface.
Examples of the properly installed video counters:.PNG)
.PNG)


Kirill
Project manager
Latest from Kirill
- Ways to use data from people counting systems
- 6 Retail Trends of 2016
- Why is it Important to Store Customer Traffic Data on Your Own Servers?
- Retail Business Winning Formula: How to Optimize the Visitor Counter Data
- Taking into Account the Personnel Interference to Retail Chain General Traffic Data and Deducting It
- A Booming Shopping Mall is …
- FAQ about people counting systems
- Accurate People Counting
- Technology Contest: 3D ASSIS vs 3D


